Starting a blog can never be a bad idea. There are no downsides–EVER!
Not only is it a fantastic way to share your thoughts, knowledge, and creativity with the world, Starting a blog is also a great way to boost your online presence and place your body of work in one corner of the internet.
Whether you’re a passionate writer, a business owner looking to boost your online presence, or someone who simply wants to share their hobbies and interests, having a little piece of the internet to yourself via a blog is the best way to go about it.

The surest way to enjoy blogging is first to to have a clear understanding of what your blog will be about and who your target audience is. Doing this early on will make the blogging journey more enjoyable and sustainable. The second surest way is to take all of the technical jargon out by using a powerful, and reliable platform to kickstart. This is where WordPress comes in.
WordPress is a powerful and versatile platform to kickstart your blogging journey. In this comprehensive guide, we’ll take you through the process of setting up your blog on WordPress.
Before starting a blog, it is important to have a domain name in mind. Your domain name is your blog’s online address and it is super important. Be sure to pick something memorable, relevant to your niche, and easy to spell. You’ll also need a web hosting service to store your blog’s files. Not to go far, we have everything you need at Gbefunwa. You can purchase a Domain Name here, and a Web Hosting right here. Hosting your blog on Gbefunwa has a plethora of benefits, from lightning fast speed, to 24/7 customer support.
Go to your chosen web hosting provider’s website and log in to your account. In there, you should be able to access your Control Panel (Most hosting providers have a control panel, often cPanel, where you can manage your website). Find the option to install WordPress. This often looks like a “One-Click Install” or “Auto Install.” Click on it.
From here, the next step is to choose your preferred domain. If you have multiple domains, select the one you want to install WordPress on. If you only have one domain, this step is usually skipped. Moving on, you will be prompted to enter some basic information about your blog, such as the site name, description, and admin username and password. Make sure to choose a strong password for security.
Afterwards, you can select a basic theme during the installation process, but don’t worry too much about this. You can change it later. Click the “Install” button. The installer will set up WordPress, and you’ll receive a confirmation once it’s done.
Your blog is now installed! You can access your WordPress admin dashboard by going to “yourdomain.com/wp-admin” and logging in with the username and password you set during the installation.
In your WordPress dashboard, go to “Appearance” > “Themes.” You’ll see a selection of free and premium themes. Click “Add New” to browse and install a new theme. If you’ve purchased a premium theme, you can upload it from your computer.
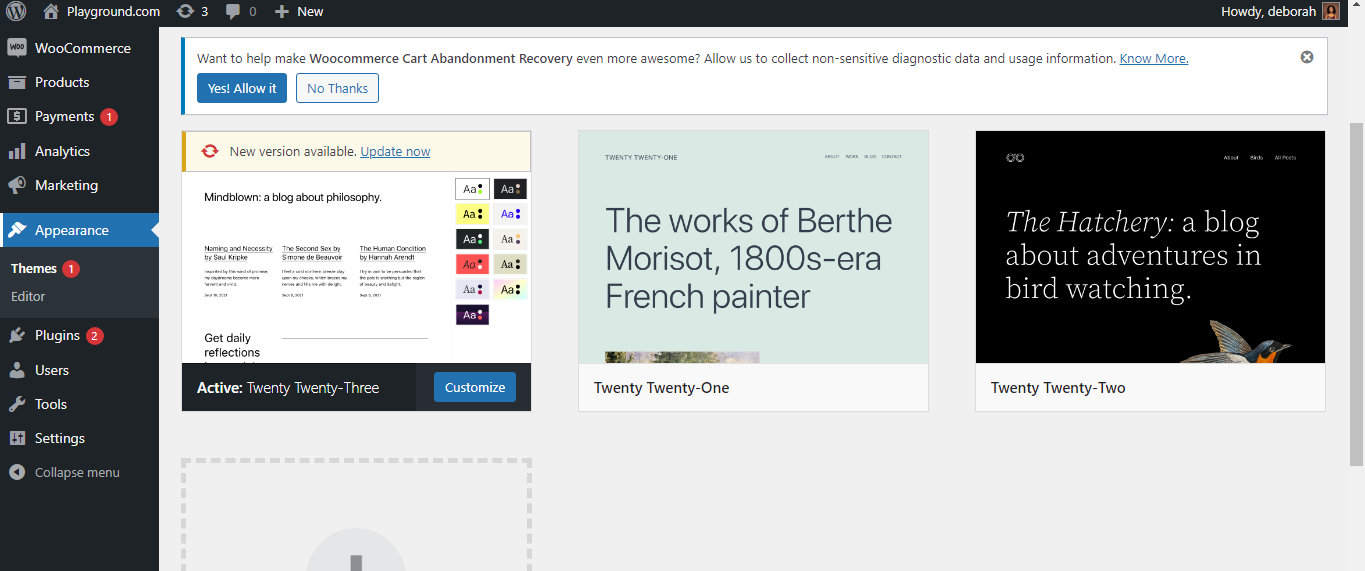
After installing a theme, click “Customize” under the “Appearance” menu. This opens the WordPress Customizer, where you can adjust various design elements.
If your theme doesn’t allow header customization within the Customizer, you may need to go to “Appearance” > “Header” or a similar option specific to your theme. Upload a custom header image or logo if your theme supports it.
To enhance design options, consider using design-related plugins. For instance, “Elementor” or “Beaver Builder” allows you to create custom page layouts with a drag-and-drop interface. However, If you have coding skills, you can further customize your blog’s design by adding custom CSS. In the WordPress Customizer, you’ll find an “Additional CSS” section where you can add your own code.
Before finalizing any design changes, use the “Preview” button within the Customizer to see how they look on your site. Once satisfied, click “Save” to apply the changes.
Remember, the level of customization you can achieve depends on your theme and, in some cases, your technical skills. Don’t hesitate to explore various themes and experiment with design settings until you achieve the desired look and feel for your blog.
Plugins add functionality to your blog. Some must-have plugins include:
Now comes the fun part! Start writing and publishing engaging content. Make sure your posts are well-structured, contain high-quality images, and are SEO-friendly. Consistency is key – aim for a regular posting schedule to keep your readers coming back for more. Also, by engaging with your readers by responding to comments and encouraging discussions you can build a community around your blog can help it grow faster and keep your audience engaged.
Also, you can utilize social media, email marketing, and other promotional strategies to drive traffic to your blog. Sharing your content on platforms like Facebook, Twitter, and Pinterest can help you reach a broader audience.
To increase your blog’s visibility in search engines, learn the basics of SEO (Search Engine Optimization). Yoast SEO, mentioned earlier, is a handy plugin for this purpose. Focus on keyword research, on-page SEO, and building high-quality backlinks. It is also good practice to regularly back up your blog to prevent data loss. Gbefunwa’s Hosting service provides automatic backups, but it is still a good practice to have your own backup strategy.
Once your blog gains traction, you might consider monetization options like Google AdSense, affiliate marketing, sponsored posts, or even selling your products and services via WooCommerce on your same website. Like I said earlier, there is no downside to owning a blog!

Deborah Oludimu is an experienced content writer with 3+ years of experience. She is skilled in research, writing, and editing to produce high-quality, engaging content across industries. Deborah is passionate about creating content that informs and inspires
© 2025 GBEFUNWA.COM. All rights reserved.
The WordPress® trademarks are the intellectual property of the WordPress Foundation, and the Woo® and WooCommerce® trademarks are the intellectual property of WooCommerce, Inc. Uses of the WordPress®, Woo®, and WooCommerce® names in this website are for identification purposes only and do not imply an endorsement by WordPress Foundation or WooCommerce, Inc. gbefunwa is not endorsed or owned by, or affiliated with, the WordPress Foundation or WooCommerce, Inc.